Sign in:

We’ve been delaying the date that we think we’re going to ship our first Cubelets kits for months now, and it’s driving us crazy. It’s annoying other people as well, and I’m sorry for that.

I studied architecture in college, but have worked mostly on software projects since then. While software isn’t always easy, it can certainly be fast. Especially now that much software is internet-based, programmers can easily iterate, fix problems, and release new versions quickly. Most architecture projects are the opposite: five years from idea to final construction isn’t out of the ordinary. Although I originally had a thought that Cubelets manufacturing could be agile and more like software production, it’s clearly more like an architecture project, and in fact it’s been about five years since we started.

We received an enormous box full of thousands of tiny magnets yesterday, and they were all about 0.2mm too long. This seems like a tiny amount, but since our magnets are cast into the plastic Cubelet shells, magnets that are too long prevent the injection mold from fully closing and can also scratch the expensive mold badly. These custom magnets came after working with the supplier for three months to get the design just perfect. We’ll have to either shave down every magnet and re-plate it, or make a new batch which takes 2 weeks. It’s the little problems like this that multiply for Modular Robotics. There are 300 different parts in each Cubelet kit, many of them custom, from almost 100 different suppliers. And since assembly happens in sequential steps, each problem holds up the process. We’ve already sorted out problems like wheels that were too small, metal parts with lead in them, faulty LEDs, and spontaneously discontinued electronic parts. I never even imagined that something like an earthquake in Japan would influence our production. Although we’re successfully solving each new problem as it comes up, we’re going slower than we hoped.

We’ve finished building circuit boards for the first 100 Cubelets kits and the software is tested and ready. When we have all of our custom-made parts in hand and can begin mechanical assembly, I’ll be able to update this post with a revised shipping date. Meanwhile, thanks for joining us on this exciting little journey.

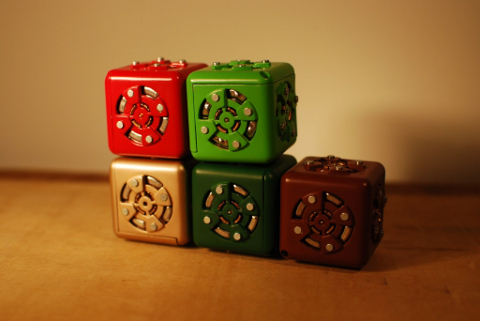
Recently, I was having a hard time deciding what to do about packaging for our first small production runs of Cubelets. I could only see two options, and both were bad. The dilemma involved either hiring a firm to design the packaging (at a cost we couldn’t afford) or doing it ourselves (which we are not particularly good at). Mark came up with the idea of holding a competition. Designers would submit entries and we would pick a winner, rewarding the designer with cash, Cubelets, and instant fame. A perfect third solution.

Later, in conversation, somebody mentioned that we were crowdsourcing our packaging design and I feel obligated to clarify. In my mind, crowdsourcing relies on the wisdom of the crowd itself, the power of collective opinion, even democracy. Crowdsourcing implies that we would use whatever packaging design that the crowd wants, which we are emphatically not doing. We are soliciting entries from individuals in the crowd, then we are deciding which one we want to use.

Democracy is a great way to structure government. But design shouldn’t be crowdsourced. Are a thousand naive voices better or more valid than one thoughtful designer’s? Probably not.

It might seem fiddly to make this distinction between the wisdom of the crowd and the wisdom of a single, particularly good designer in the crowd. But this is something that we’re trying hard to teach with Cubelets. Today in the media, we’re seeing a lot of oversimplification — phrases like “society has a negative view about…” or “America voted for….” I think these are poisonous ways to think about the world. Society has no views: certain individuals do (but others don’t). America didn’t vote: Americans did, and many of them probably voted the other way. By generalizing and refusing to look deeper at the complexities that cause some emergent phenomenon, we’ll never be able to solve (or even understand) the really big problems in the world.

Packaging Design Cubelets drawing
OK, so we’re getting ready to ship our first 100 Cubelets kits, and we’d like to do better than just putting them in a big padded envelope. So, we’re asking for your help in spreading the word about our Packaging Design Competition. Basically: design a package for shipping and storage of our 20-block Standard Cubelets Kit and win a $1000 cash prize and/or a Standard Cubelets Kit. The rules and details are simple enough; the competition ends April 15, 2011.10

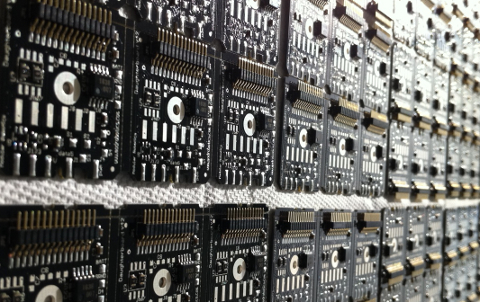
When I was a kid, I remember hearing about an inspired teacher who tried to convey how large a million is by dropping a million kernels of popcorn on his students from some trap doors in the ceiling. I always secretly wished that one of my teachers would do the same thing. Would a million popcorns cover the floor? Would they be a foot deep? In case you’re curious about how much 10,000 tiny circuit boards is, I’m happy to report: they’ll almost bury you! If you’re sitting in a very tiny room.

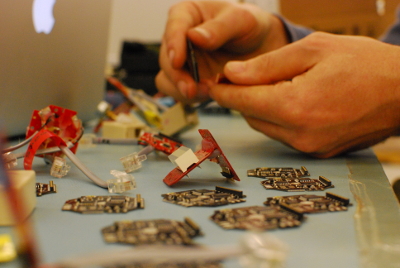
We used a robot to place the components on our earlier run of 2000 circuit boards, but we placed components on the rest of the boards ourselves, with tweezers, here in Boulder, Colorado. We look like a little factory these days. Eric will be in China at the end of January retrieving the plastic pieces we need to assemble complete Cubelets and they’ll be available soon after that!

We made 2000 tiny circuit boards this weekend!

We used a giant robot; it’s called a Pick and Place machine because it picks up each tiny electronic component from it’s package and places it perfectly on the circuit board. It’s fast, accurate, and fun to watch (for a little while).

Robot Assembly – Pick and Place

It’s exciting to see Cubelets coming together. Only 10,000 more circuit boards to go!

One of my lab-mates expertly assembled our MakerBot 3D printer a few months ago. I’m not quite sure what happened next, but last week the MakerBot was placed on my desk with the indication that it needed to print within the next few days. I had heard rumors that the stepper motor drivers were blown. I also knew that the Plastruder thermistor was not working. And the Plastruder had never actually extruded anything.

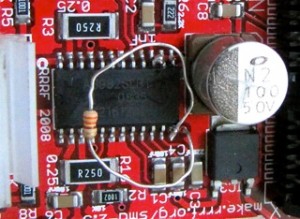
It turns out that pin 12 (half step enable pin) on two of our stepper driver boards was shorting to ground. The symptom of this short was an extremely hot voltage regulator, and by association the large capacitor next to it. The quick and dirty solution was to cut this pin. With both of our motor drivers this was all that was needed to bring the MakerBot axis’s back to life! It is important to check and make sure that MakerBot still moves 1cm when you tell it to move 1cm. Ours was now moving twice as far as we wanted because half stepping was no longer enabled.

Pull-up resistor on pin 12 (halfstep enable).

The solution to this was different for each driver. On the Z axis all I needed to do was solder a pull-up resistor to pin 12. The Z axis was 1/2 stepping again but this didn’t work on the Y axis. After considering updating the firmware to compensate for the full step, we agreed to swap out the stepper driver chip. Eric’s soldering skills had this done in no time. Once again the MakerBot was precisely stepping in all directions!

New thermistor circuit floating in a pool of hot glue over AUX pin 7.

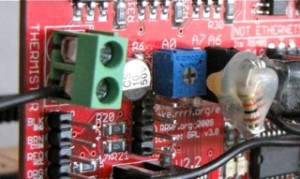
To fix the dead thermistor, the lab had tried several things including re-wrapping the Plastruder head and replacing the thermistor itself. I had a feeling that the analog to digital converter pin was blown on the AVR, and I knew from past experience that I could likely just switch A to D pins and be good to go. Finding the source code for the Plastruder board was the hardest part of this task. I feel like I am missing something obvious here, but I spent hours reading wikis and blogs with no avail. After all that I was only able to find an older version, so I used that. I switched the firmware to use pin 7 and soldered my own filter and pull-up circuit floating in a pool of hot glue above the aux pin 7 socket.

The last problem was to get the Plastruder to actually extrude. The idler wheel was not tight enough, and the ABS was stripping. My first solution was to over-tighten the idler wheel, unfortunately chipping it and breaking the entire thing. Luckily for me a lab partner quickly laser cut a new 6mm wide wheel, and after reconfiguring the Plastruder head I was able to make the new (faster, stronger) wheel fit.

We also have a heated table. A few lab partners have seen it work, but I never have. I just connected the heater to a bench top power supply at about 2 amps and got a nice 107C on the table. Getting the raft to stick to the build platform is challenging, but adjusting the z axis by hand seems to do the trick. Finally, we’re printing parts on our MakerBot. Truthfully, the whole Plastruder is pretty janky, but MakerBot has just released a Mk5 Plastruder head and we’ve got one on the way. Stay tuned…

Cubelets are little robotic blocks that you can snap together to make bigger robots that drive around, do smart things, and act like they’re alive. With no programming involved, Cubelets are totally different from other robotic construction kits. Each little cube talks to its neighbors, and in the same way that flocks of birds can end up doing surprising things, robotic actions emerge from all of the interacting cubes.

I’ve been working on this project since 2006 so I’m pretty excited to finally unveil the kit’s new name and logo. The kit used to be called roBlocks, but there was some trademark hassle. Moxie Sozo, a Boulder-based graphic design studio, did this fantastic logo design for us. Gorgeous web site coming soon.

We’ll have kits for sale on www.modrobotics.com before the end of this year!

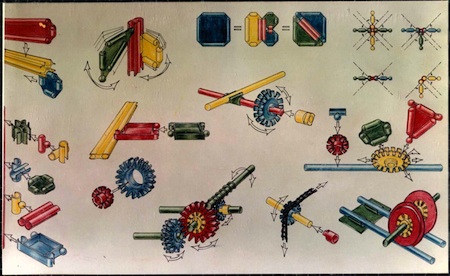
My friend Don Witte, the W in W.H.O., a construction kit toy company of the 1960s, designed several clever construction kits. In its day, his company was much in the same spirit as Modular Robotics is today. He wrote, “While adults are going to the moon, their children are playing with primitive wooden blocks, sticks, and nuts and bolts. Isn’t it time to provide our children with construction toys which fully utilize the advances in technology and the materials of the time?” We couldn’t agree more. The company produced working prototypes of four kits: Moduflex, Cylispheres, Zox, and MollyCools. They’re each different–Moduflex was perhaps the most technically sophisticated with gears and chains as well as a snap-together panel system, and it came in variations–a train kit, an architectural kit, and more. The prototypes were all made on an injection molding machine in Don’s dome in the hills west of Boulder. Sadly, they never came to market, but Don was kind enough to let me have his kits.

Eric and I have been jousting over who gets to use the only Digital Multi Meter (DMM) in our lab. To solve the issue Eric picked up a do it your self DMM Kit from SparkFun Electronics. This morning I had the pleasure of assembling it! As I opened the box, past memories of electronic kit building started to haunt me. How was I going to figure out which direction the capacitors went, or what resistor values went where? All my anxiety was washed away by the clearly labeled circuit board and the short, precise instruction manual. It was a breeze to assemble the kit, and once I found charged batteries, the new DMM booted its AVR microcontroller and functioned perfectly. With its simple, straight forward design and open source code, it’s going to be a challenge not to customize the firmware to make this DMM more my own. And now with the new laser cutter up and running at Modular Robotics, we should have a custom enclosure cut out in no time!

For fun, I made a little time-lapse movie of the assembly.