This is an archived site.
Please visit the Modular Robotics current site for up to date prices and information.


 Cubelets are little robotic blocks that you can snap together to make bigger robots that drive around, do smart things, and act like they’re alive. With no programming involved, Cubelets are totally different from other robotic construction kits. Each little cube talks to its neighbors, and in the same way that flocks of birds can end up doing surprising things, robotic actions emerge from all of the interacting cubes.
I’ve been working on this project since 2006 so I’m pretty excited to finally unveil the kit’s new name and logo. The kit used to be called roBlocks, but there was some trademark hassle. Moxie Sozo, a Boulder-based graphic design studio, did this fantastic logo design for us. Gorgeous web site coming soon.
We’ll have kits for sale on www.modrobotics.com before the end of this year!
 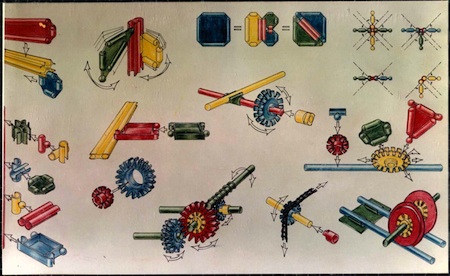 My friend Don Witte, the W in W.H.O., a construction kit toy company of the 1960s, designed several clever construction kits. In its day, his company was much in the same spirit as Modular Robotics is today. He wrote, “While adults are going to the moon, their children are playing with primitive wooden blocks, sticks, and nuts and bolts. Isn’t it time to provide our children with construction toys which fully utilize the advances in technology and the materials of the time?” We couldn’t agree more. The company produced working prototypes of four kits: Moduflex, Cylispheres, Zox, and MollyCools. They’re each different–Moduflex was perhaps the most technically sophisticated with gears and chains as well as a snap-together panel system, and it came in variations–a train kit, an architectural kit, and more. The prototypes were all made on an injection molding machine in Don’s dome in the hills west of Boulder. Sadly, they never came to market, but Don was kind enough to let me have his kits.
  We just moved Modular Robotics into a great new space in downtown Boulder, Colorado. If you’re local, come visit us at 2500 Pearl Street, right above Mike’s Camera. It’s no coincidence that our new building is in the shape of a cube. If you squint, you can see Mark through the window, and also the mad style of our old-doors-on-sawhorses work tables. And look – there’s UPS ready to bring our robots right to you.
 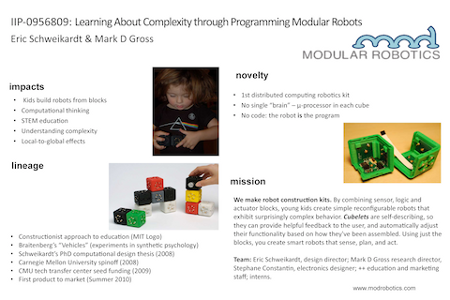 I’m just now getting around to posting about the NSF SBIR Phase II Grantees meeting that I attended last month, in Baltimore. Our SBIR grant requires that we attend this meeting each year. The meeting is designed to help grantee businesses “share their technical and commercial achievements with the NSF program staff, potential investors and strategic partners, as well as having an opportunity to network with other small businesses for possible collaborations to grow their businesses.” Lots of information to help techies make their good ideas become reality.
Of course, with hundreds of companies in a wide range of technical areas, the meeting can be overwhelming. For example, I went to a talk on “New Synthetic Approaches to Higher Performance, Lower Cost CO2/CH4 Gas Separation Membranes” — good stuff, but a little far from Modular Robotics’s core business. Still, it was good to meet the other SBIR II education grantees, which include our friends Alex Repenning (Agentsheets), Chris Hancock and Ricky Carter from Tertl Studios, and robotics company Road Narrows, Agile Mind (co-founded by Adele Goldberg), and many more. I don’t have any pictures from the meeting (big hotel ballroom with lots of people), but above you can see our dazzling entry for the poster session, where I also gave impromptu demos of our old prototype.
 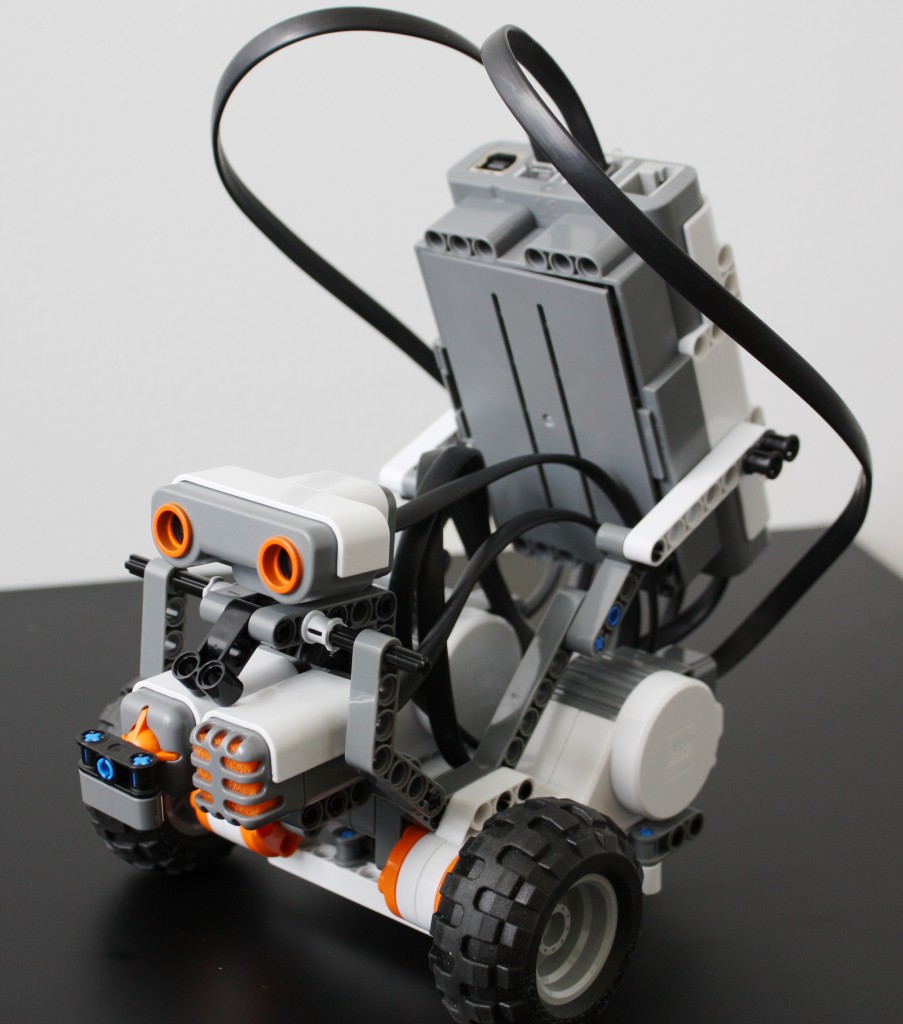 The most exciting, albeit fairly simple robot that I built today has been named Sam. He drives towards something, and as he approaches it, slows down until he hits it. After he hits it, he quickly races backwards, turns a little bit, and drives forward again. An interesting challenge in building this robot was to make a bumper that actually senses bumping! Just a simple small button will only detect straight-on hits. After messing around with different types of bumpers for a little while, I decided to just do a distance sensor: when the robot gets really close to something, it backs up. It was very fun to watch the robot drive around running into things on the floor!
Then, I decided that I wanted to add clapping control. The goal was to have the robot pause for 2 seconds whenever I clap my hands. This didn’t turn out to be as easy as I had hoped! There are a few different ways I tried to do this: using a ‘switch’ block, using the ‘compare’ function, and using a ‘logic’ function. The thing that I found the most difficult about working with Mindstorms software is how very simple it is. I am used to working with LabVIEW, in which there are thousands of functional blocks to choose from. In Mindstorms software, there are less than 25. I discovered a ‘custom’ block option today, however… so it might be possible to make many more complex blocks to work with. In any event, I have not yet found a way to actually get the clapping control functional! At this point I just have a robot running around, charging into things and then backing up and doing it again.
Wednesday entertainment: Sam.
 Since we’re getting close to firing up the injection molder for our first run of commercial blocks, we’ve been thinking a lot about color. We use color to differentiate the different blocks by function, and we want the colors to both make sense and look cool when the blocks are assembled into a robot. In our research prototypes we made Action blocks white, Sense blocks black, and used rainbow colors for the rest. The rainbow just happened because of the material colors that were available for the Stratasys 3D printer we were using — it seemed a little too young, like how the color and scale of Duplo makes it obvious that it’s for little kids. And the white got dirty easily.
For our first run, Sense blocks will still be black, but Action blocks will be transparent. The transparent cubes look great (they remind me of Capsela) and we’ll be posting some new photos shortly. And we’re settling on the color palette shown above for the Think and Utility blocks. It’s not a rainbow but the colors are easy to differentiate. It’s a little earthy, and since Passive blocks will be green, may even make a robot look a little bit natural.