A.K.4 | Robot and Human Senses
An Introduction to Robots and Cubelets

Created by: Brandy Ray
Lesson Overview:
In this lesson students will investigate the similarities and differences between human bodies and robots including human senses and robotic sensing (input/output relationships). This lesson can be taught after Lesson 1 of An Introduction to Robots and Cubelets, or as a stand alone unit if students have some background knowledge of different cubes and how they work. We also recommend reading the Education Information Sheet for additional information regarding lesson plans.
The Basics:
Ages: 4-7Time: Part 1: 25 minutes; Part 2: 25 minutes, multiple days
Prep Time: 5 min. Plus an additional 15 min. to make a sensory box
Lesson Objectives (for the students): Students will investigate Cubelets to understand how cubes work together to create robots.
21st Century Skills: technology, literacy
Concepts: Science, Literacy, Technology
Required Cubelets: Mini Makers or original Modular Robotics Educator Pack – All Think Cubes Removed, Extra Battery Cubes
Additional Materials: Sensory Box (optional, see below)
Objectives:
Students will be able to identify their five senses. Students will demonstrate recognition that a robot has sensors that help tell it how to interact with its environment. Recognition can be demonstrated verbally or through interactions with the Cubelets.
The Standards:
ISTE: International Society for Technology Education- ISTE Standard – Technology Operations and Concepts A: Understand and use technology systems.
- CCSS.ELA-LITERACY.CCRA.SL.2 – (Common Core Speaking and Listening Anchor Standard 2): Integrate and evaluate information presented in diverse media and formats, including visually, quantitatively, and orally.
- CCSS.ELA-LITERACY.RF.K.1.D: Recognize and name all upper- and lowercase letters of the alphabet.
- Pre-K TS GOLD Standard 12 – Cognitive: Remembers and connects experiences
- Pre-K TS GOLD Standard 15 – Literacy: Demonstrates properties of phonological awareness B: Notices and discriminates alliteration.
- Pre-K TS GOLD Standard 16 – Literacy: Demonstrates knowledge of the alphabet.
- Pre-K TS GOLD Standard 25 – Science and Technology: Demonstrates knowledge of the characteristics of living things.
- Pre-K TS GOLD Standard 26 – Science and Technology: Demonstrates knowledge of the physical properties of objects and materials.
- LS1.A – Structures and Functions: All organisms have external parts. Different animals use their body parts in different ways to see, hear, grasp objects, protect themselves, move from place to place, and seek, find, and take in food, water and air. Plants also have different parts (roots, stems, leaves, flowers, fruits) that help them survive and grow. (1-LS1-1)
Lesson Plan: Part 1
Anticipatory Set – My Five Senses
Time: 25-30 Minutes
Section Overview: In this section, students will explore the five senses through literacy and game connections. This background knowledge will help support students as they learn about Sense cubes that allow Cubelets to interact with their environment.
My Five Senses: Read – My Five Senses by Aliki, or watch one of the links about the five senses below:
- The Dr. Binocs Show – Learn Series For Kids: The Five Senses
- The Dr. Binocs Show – Learn Series For Kids: The Five Senses – Safeshare link (ad-free):
- Mr. R’s 5 Senses Song
- Mr. R’s 5 Senses Song – Safeshare link (ad-free):
Connect to Literacy: CCSS.ELA-LITERACY.RF.K.1.D Recognize and name all upper- and lowercase letters of the alphabet.
After exploring the senses, read R is for Robot: A Noisy Alphabet by Adam F. Watkins. This book helps reinforce letter names and sound knowledge.
After reading the text ask students what sense would help tell their brain about all the sounds in this book?
Sensory Activity Ideas:
Sensory Mystery Box (Optional):
Put one or more objects that will appeal to the five senses in your sensory bag or box. Let students take turns feel the objects inside the box, shake the box to listen for sounds, and smell inside the box to try to find clues about what’s inside, but no peeking!
Sensory Box Ideas: These are just a few ideas. Change up items frequently to keep student interest!
- Small toys
- Flowers
- Bells or shakers
- Scarves
- Dried leaves or herbs
- Seashells
- Bean Bags
- Packing peanuts
- Cheerios – not to be eaten
- Putty
Safety Consideration: Before putting natural or edible materials in your Sensory Mystery Box, be sure to consider any potential allergy issues in your classroom.
Introduce the Sensory Box: Tell students: Now that we have been learning about our five senses, we are going to use our sense of touch, smell, and sound to take turns making guesses about what’s in our sensory mystery box!
Classroom Management Tip: If there is not enough time to have every student feel inside, ask a few students to try the mystery box during a circle time, or other whole group time for several days until everyone has had the opportunity to use senses to explore inside the box. Be sure to change up the contents of the box regularly!
Making a Sensory Mystery Box: To create a Sensory Mystery Box, take an old shoebox, tape down the lid, and cut a hole in one side. You can make the hole large enough for a child’s hand, or you could cut the end off an old sock and create a tube with the sock that leads into the hole. Decorating the box can add to the fun and integrate students’ sense of sight!
For more information about sensory boxes visit these sites:- http://www.preschoollearningonline.com/science-activities-for-preschoolers/mystery-box-science-sensory.html
- http://www.scholastic.com/teachers/article/group-time-feely-bag-games-problem-solving
- http://www.imhpromotion.ca/portals/0/IMHP%20PDFs/CPT%20Activity_Feely%20Bag%20Game.pdf
*Note: Sensory Bags can also be used.
Play a Sensory Game (Optional):
In addition to the Sensory Mystery Box, or in lieu of that activity, you can also play a number of games with students to activate their background knowledge of the five senses. Below you will find links to several games you may want to try!
Robots and Sensing Part I:
- https://archive.modrobotics.com/edu/Sensing-part-1.pdf
- Scroll to Simon Says Sensing for a great senses game that helps teach students about input and output values.
The Five Senses Science Activities and Experiments from Education.com:
- http://www.education.com/activity/the-5-senses/
- Use this website to find several fun sensory experiments to do with students.
Lesson Plan: Part 2
Sensors and Robots:
Time: 25-30 Minutes over multiple days
Connect to Vocabulary: Preview the following words to build student background knowledge
- Sensor – a robot part that helps it get information from its environment.
- Input – to put in
- Output – to put out
Robot Sensors Teach: When you use your senses they give your brain information. This information can help you learn things, know what’s around you, and know how to act. Your senses input, or put in, information, and your brain outputs, or puts out, an action.
Robots have parts similar to our senses called sensors. Sensors help robots figure out what they need to do, too. When a robot’s sensors put information to its computer brain, we call it an input. When the robot acts, we call it an output.
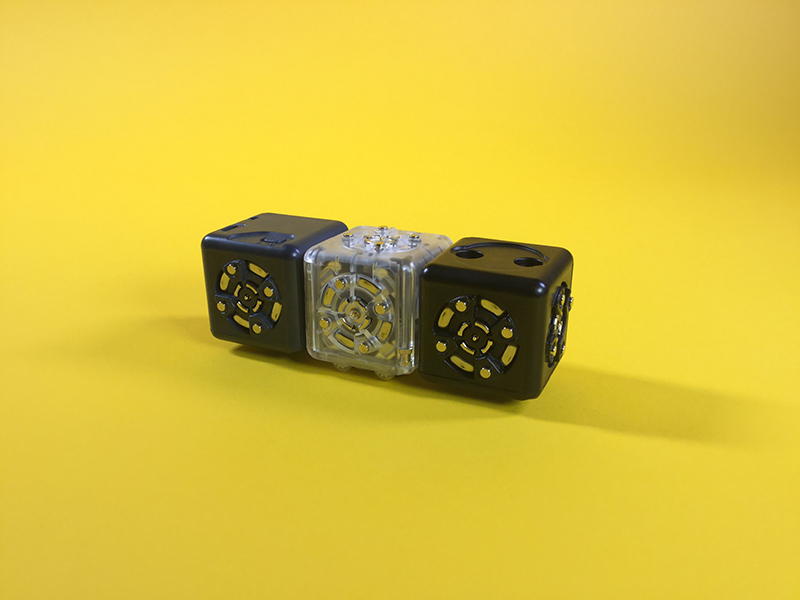
We’ve learned that robots sense, think, and act, so we know that the black Cubelets are the Cubelets that have sensors. Today, we are going to build robots with different black cubes to figure out what the robot is sensing.
Create a driving robot with the Distance cube, Battery, and Drive cube.
Ask students if anyone knows how to make it drive. Have students try or demonstrate a way to make it move. If students have had some experiences with the Cubelets, they will probably know that they need to hold their hand over it to make it drive.
How does this robot move? What is the black cube sensing?
Make it concrete: Take off the Distance cube and hold it up. This cube looks like it has eyes, but it doesn’t see like we do. Instead it senses how close or far away something is. When I hold my hand close to it, it gets a big sense of something nearby it. If I put my hand farther away from it, it gets a small sense of something close to it. If I take my hand too far away from it, it can’t sense that anything is close to it anymore.
Teach and Explore other Cubes and Robots:
This can be done over several days.
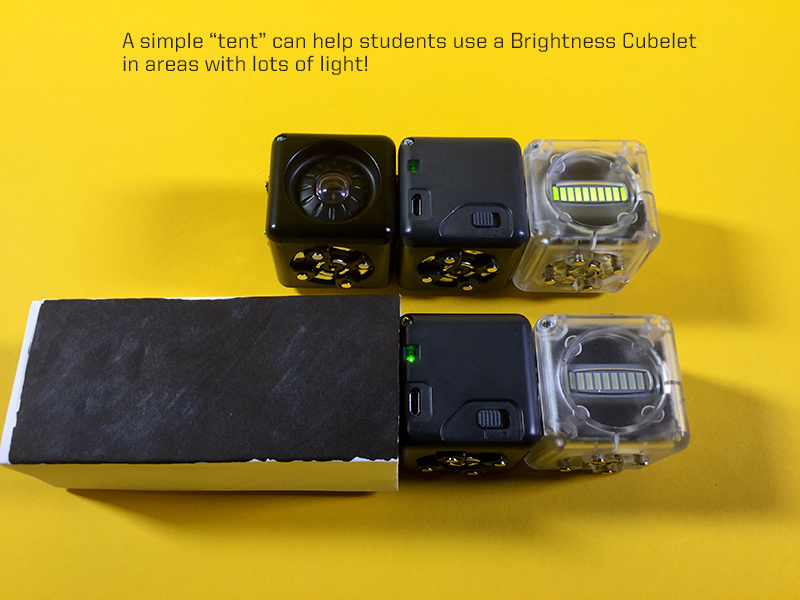
Brightness Cube: Put together a robot using the Battery, Brightness cube, and Flashlight. In a room with the lights on the flashlight will light up. Ask students to predict what they think the Black cube is sensing.
Say, “Wow! This robot is already doing an action and I just put it together. It must be sensing something that’s already happening in the room. What do you think it’s sensing?”
Listen to a few student ideas. If no one comes up with the lights, say, “Wait! What about the lights? Do you think it can tell the lights are on?”
Turn out the lights or put something over the Brightness cube to block the light to show students what happens.
Temperature Cube: Create a robot using the Temperature cube, the Battery, and any clear, Action cube. Tell students that this is a special cube that likes when it’s really warm. It can sense how warm a room is. If it is hot or cold outside, go outside to show students how the temperature affects the robot. You can also blow on the Temperature cube to give it a higher input value, or put it next to a cold object to give it a low input value. You can also place your Cubelet in a refridgerator for about 5 minutes or use a hair dryer, just don’t get too close! This will show students how the heat or lack of heat affects the robot.

Knob Cube:
*Note – Using the Knob cube is a great way to discuss input and output values.
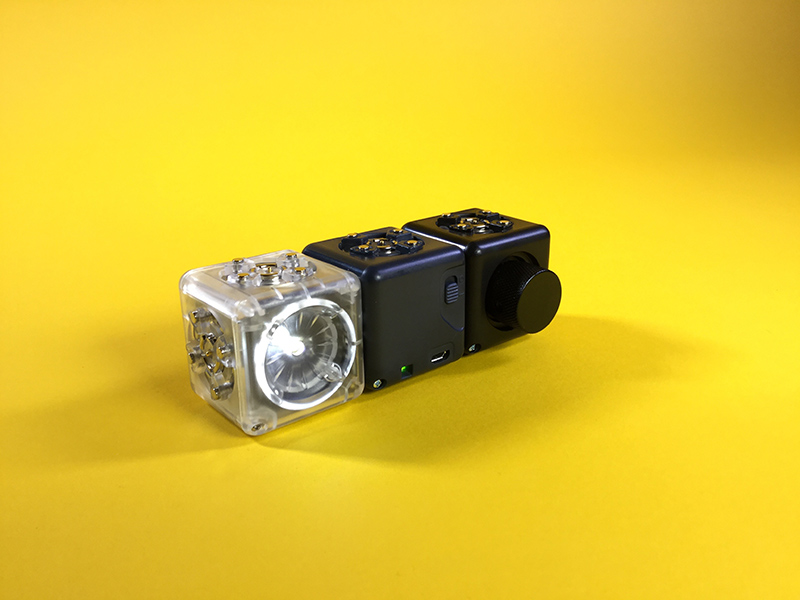
Create a robot using the Knob cube, Flashlight cube, and Battery cube. Show students the robot and ask them if they think they know how the sense cube on this robot works. (You may need to remind students that sense cubes are the black cubes.) Since many students have had experiences with knobs on other toys and everyday items, they will often know how to operate this robot.
After students recognize how to turn the robot on, discuss input and output values by connecting to student experiences. Tell students, when you hear a really loud sound, your ears input a big amount of sound to your brain. When you hear a quiet sound, your ears input a small amount of sound to your brain.
Robot sensors are like that too. If you turn the knob a lot, there will be a big input sent to the robot’s computer brain, so the flashlight is bright! If you turn the knob just a little, there will be a little input sent to the robot’s computer brain, so the flashlight is not as bright.
Inquiry Question: Can you figure out how to send a big input or little input to the other robots. See if you can make the Drive bot driver faster or slower!
*Note: Some teachers may want to hold off on all of the explanations for the sense cubes and instead lead inquiry-based opportunities to allow students to develop these ideas on their own. This may work well for older learners especially.
Some guiding questions you can use to encourage your students to think about the sense cubes are:
- What do you think the robot is sensing?
- How can you test that to see if you’re right?
- If you weren’t right, what other things could you try?
- If you were right, can you use the robot’s sensor to control the robot? Can you make the Drive bot drive faster, or the Flashlight bot shine brighter?
Assessment Ideas:
After modeling the functions of a few different sense cubes, observe students as they build with the Cubelets. Watch to make sure students are using at least one sense cube, one action cube, and a Battery cube. Then watch to see if they can use the sense cubes to control their robots.
Classroom Management Tips:
- Put on the Brakes: If your students are very young, make sure you introduce only one sense cube at a time and then let students explore using only that sense cube before introducing another sense. This will cut back on teaching time and will allow students opportunities to make connections before they dive into new material. You can also limit the number of action cubes if you want, so everyone can work with a partner to build the same robot at first. Remember: If students struggle using the materials well, you can always revisit early lessons in this unit!
- Cubelets are a Team: Remind students of the following expectations for working with Cubelets:
- Work Together – Sharing and taking turns helps us work as a team.
- Respect Materials – Teammates and scientists take care of their equipment. Use Cubelets with safe, gentle hands and always return them back to the place you found them.
- Talk it Out – Team members take turns sharing ideas about what will happen and what to do next!
- Split the Kit: Using multiple kits or splitting up a larger kit can help students access more materials which can decrease sharing issues. Remember that if you split up a larger kit, every group will need a Battery Cubelet. If using more than one kit, it can be helpful to number the kit and the cubes or print out a list of cubes that go with each kit, so kits remain separated.
- Charge It: Remember to charge the batteries for your cubes before and after each experience. If you have extra batteries it’s helpful to have these charging, so there are backups.
Reading your Cubelets: Every Cubelet has a small LED light in one corner which flashes (except for the Battery which stays solid). When the Cubelet is part of a robot and the robot’s Battery block is turned on, the LED light is on too. This LED light shows that the Cubelet is getting power and talking to its neighbors. Each Cubelet robot must have one Battery block, which powers all the other blocks in the robot.
The Battery block has a small switch. When you slide it to the O, the Battery block is off. Slide to the line and it is on. Turn it off to save battery life when you aren’t playing with your Cubelets.
The Battery block has an internal, rechargeable, battery. To recharge the Battery block, plug it into a micro-USB power source.
If you’d like a more indepth look into how Cubelets work, visit the Cubelets Getting Started Guide.
- Call for Backup: If group management becomes challenging in your setting, consider asking a parent volunteer to come in and assist with activities.
This work is licensed under a Creative Commons Attribution-ShareAlike 4.0 International License.
![]()