When your students are ready to begin coding with their Cubelets, it’s time to consider what new classroom structures and routines will ensure students maximize their time investigating and learning. By planning ahead, you can avoid the time sinks of troubleshooting and learning a new app on the fly. We have two different Cubelets you might be using, and they both have different paths to classroom management success.
Before you plan to program your Cubelets with students, please try programming one yourself. Some school internet filters block the cloud services we use. If that is a problem for you, simply send this request to your IT department and once they’ve greenlighted our servers, try again! Still have questions? Email our Customer Support Team at support@modrobotics.com (They’re amazing!).
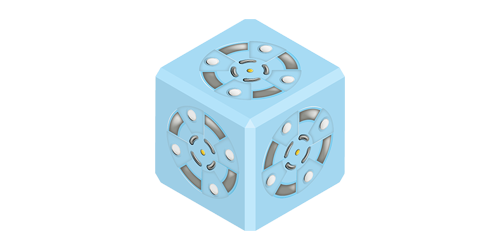
Using the Classic Bluetooth Cubelet
If you are using the Bluetooth Hat:

The new Bluetooth Hat is the fastest and easiest way to connect to any of the Cubelets apps. With the Hat, your classroom structures can be streamlined to focus on basic setup and troubleshooting.
BEFORE STUDENTS:
First, make sure to download the Cubelets Discovery app or Cubelets Blockly onto your student devices. Blockly is currently supported on Macs and iPads, and will be available for ChromeOS and Windows soon. Keep an eye out for our announcements on Twitter!
Also, check that all your Cubelets are currently running their Default program. You can easily check this in either Cubelets Discovery App or the Cubelets Blockly App, or you can skip the screens altogether and run one simple test:
- On every Cubelet, there is a small green light in one corner. It is on the side opposite from the unique sensing or acting face. Attach all your Cubelets with that small green light on the same side. Then, attach the Battery and turn it on.
- Watch the green lights as they boot up — they will all blink simultaneously 3 times before they commence a random pattern. If any Cubelets are currently running custom code (meaning they’ve already been programmed), they will blink 4 times instead of 3.
- You can repeat this test as many times as you need by turning off the Battery and then turning it on again. The crucial blinking only occurs when a Cubelet first receives power.
BEGINNING OF CLASS ROUTINES:
Device Routines: Since the Hat uses proximity pairing technology, you don’t have too much to worry about. Most important is ensuring that students understand how to turn on the Bluetooth pairing on their device. This way it will automatically find the Hat once the Battery Cubelet is turned on.
Quirks within the App: Plan to be clear with students about when they are supposed to be in the Remote Control section of the app versus the Personality Swap section of the app. Both are important for totally different purposes.
With the Bluetooth Hat, you don’t need to worry about students swapping Hats between groups, or disconnecting it from the Battery, their devices will automatically pair to the closest Hat, so get out there and have a great time!
END OF CLASS ROUTINES:
Be sure to have students reset all their Cubelets back to the default Personality before cleaning up at the end of the day. We recommend using the Cubelets Discovery app for this because it can reset all of the Cubelets with one click.
(Always remember to plug the batteries in to charge at the end of class!)
If you are using the classic Bluetooth Cubelet:
If you are using the classic Bluetooth Cubelet, these important tips are going to be key to a successful programming class!
The trick is to keep the Battery and Bluetooth Cubelets connected, and to ensure Battery stays turned on.
BEFORE STUDENTS:
-
- Download the Cubelets Discovery app or Cubelets Blockly onto your student devices
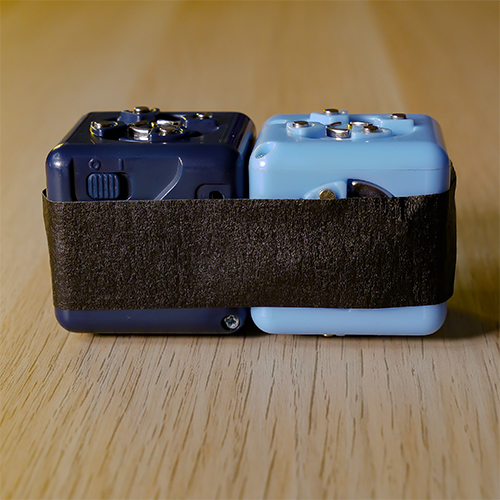
- Tape one Bluetooth Cubelet to the Battery Cubelet. This will help students remember to not separate them. (see example)
3. With only one device at a time, turn on the Bluetooth settings and pair one Bluetooth Cubelet to it.
- ONLY PAIR ONE DEVICE TO ONE BLUETOOTH CUBELET at a time!
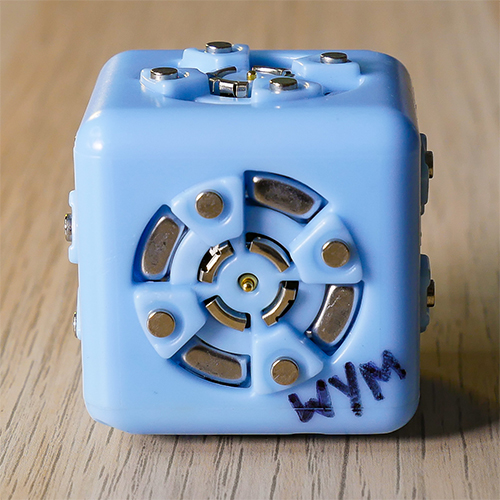
4. Once you’ve paired one Bluetooth with a device, mark them in some way so you can keep them paired together. I write the “name” of it on the actual Cubelet with a Sharpie (you’ll see the name when you pair it to your device, e.g.Cubelet- ABC). Then put them away and repeat with each Bluetooth and student device. (see example)
Also, check that all your Cubelets are currently running their Default program. You can easily check this in either Cubelets Discovery App or the Cubelets Blockly App, or you can skip the screens altogether and run one simple test:
- On every Cubelet, there is a small green light in one corner. It is on the side opposite from the unique sensing or acting face. Attach all your Cubelets with that small green light on the same side. Then, attach the Battery and turn it on.
- Watch the green lights as they boot up — they will all blink simultaneously 3 times before they commence a random pattern. If any Cubelets are currently running custom code (meaning they’ve already been programmed), they will blink 4 times instead of 3.
- You can repeat this test as many times as you need by turning off the Battery and then turning it on again. The crucial blinking only occurs when a Cubelet first receives power.
BEGINNING OF CLASS PROCEDURES
- Be sure to pass out devices with their matching Bluetooth Cubelets (each still taped to a Battery Cubelet).
- Students need to understand that they should not swap Bluetooth Cubelets from device to device.
- Warn students to keep their Bluetooth Cubelets & Batteries attached, and to keep the Battery Cubelet on once they’re in the app. If they need to make their robot stop moving, recommend they remove the SENSE Cubelet(s) instead.
- Students need to turn on the Bluetooth on their devices, then practice pairing their Cubelet to the device.
- Plan to practice the “Forgetting Device” and re-pairing with students before they begin coding, so they have some troubleshooting strategies when they’re programming.
- Consider printing this troubleshooting page to have available for students; it may be wise for students to practice each of the suggested tips before they’re programming so you can be sure of their troubleshooting capabilities.
- Then students should practice this “worst-case scenario”:
- Pair the Bluetooth Cubelets with the device.
- Open Blockly.
- Turn the Battery off (which disconnects and unpairs the Bluetooth).
- Exit Bockly.
- Re-pair the Bluetooth Cubelet with the device.
- Re-open the app.
END OF CLASS ROUTINES:
- Be sure to have students reset all their Cubelets back to the default Personality before cleaning up at the end of the day. We recommend using the Cubelets app for this because it can reset all of the Cubelets with one click.
- Plan ahead to make sure students return their devices with matching Bluetooth Cubelets in an organized fashion. (Always remember to plug the batteries in to charge at the end of class!)
Did you enjoy this blog post? Sign up for the #CubeletsChat Newsletter and get notified when we post new tips & tricks. Have hints you want to share? Use the #CubeletsChat hashtag on social media!